In Brand Studio, building a brand concept is a structured production pipeline that moves from a concept to a production-ready asset. By combining your specific product visuals with automated production and refinement tools, you can create large amounts of content quickly and avoid the long wait times of physical photoshoots.
What it is
This workflow is a multi-stage production process. The platform simplifies the technical side of creation, allowing you to focus on high-fidelity results for your brand rather than managing underlying technology.
Why it matters
Traditional brand development is often slow and expensive. Starting a concept in Brand Studio allows for:
- Asset Reuse: Quickly isolate subjects for use in different design systems.
- Regional Localization: Efficiently generate regional or seasonal variants of a single hero asset.
- Operational Scale: Test dozens of environments and layouts in minutes to identify the most successful creative direction.
How to use it

- Generate the Initial Concept: Begin by executing a subject-focused process to explore visual directions. Focus your text input on the what of the scene, leaving the aesthetic how to your selected Style Presets.
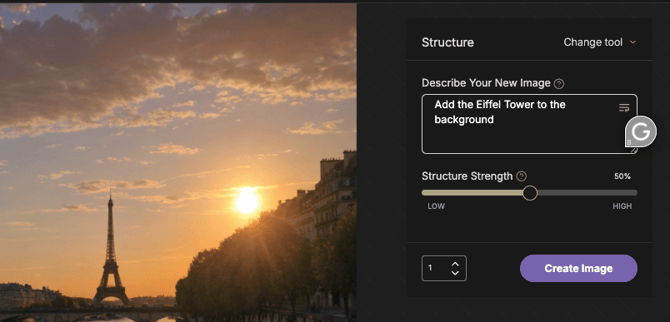
- Establish Structural Guidance: Navigate to the Structure tab to enforce the exact positioning and scale of your subject . Enter a specific text description in the Describe Your New Image field to guide the spatial arrangement without manual drawing. Adjust the Structure Strength slider to set how closely the new generation follows this structural layout.
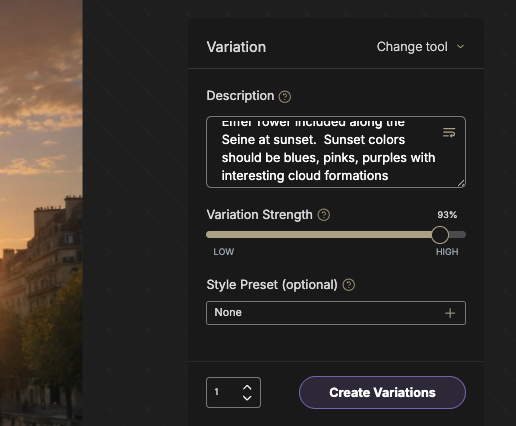
- Explore Variations: Review your candidates and use the Re-Roll tool to test new seeds or the Variation tool to produce siblings that share the same compositional DNA .
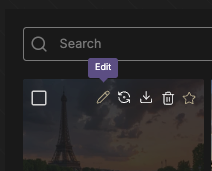
- Refinement: Select Edit on your best candidate to move it into the workspace . Use Inpainting to fix small distortions or Remove Elements to clear any background distractions.
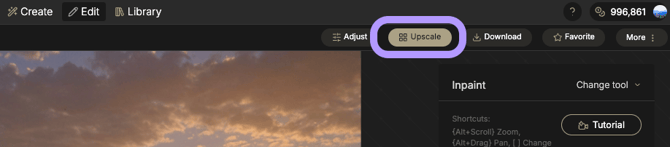
- Finalize for Production: Once the details are correct, click Upscale to transform the concept into a high-fidelity asset suitable for print or 4K digital delivery
Best Practices
- Subject-First Prompting: Focus your text input on subject matter and composition, leaving aesthetic descriptions to Style Presets to avoid redundant or conflicting tokens.

- Fine-Tune with Image Adjustments: Use the Image Adjustments panel to manually harmonize your final result. Adjusting sliders for Brightness, Contrast, and Saturation allows you to blend a subject into its environment with higher precision than relying on the initial generation alone.
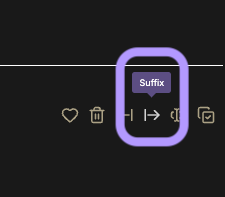
- Modularize Successful Processes: Use the Prefix and Suffix tools in your Prompt History to treat successful subject or style fragments as reusable snippets for your team.
- Check High-Stakes Areas: After applying a final Upscale, zoom in 100% to check specific areas like eyes and text, as these are common failure points for artifacts.