Brand Studio is a professional platform for managing your creative work at scale. It replaces the guesswork of traditional image generation with a structured way to build assets using three main features: Customization to match your brand, Scale to create more content faster, and Precision to fine-tune every detail.
What it is
Brand Studio is a central hub for professional creative operations. The platform simplifies the technical side of creating images, allowing you to focus on getting the right results for your brand without needing to manage the underlying technology.
Why it matters
Standard asset creation can be slow and expensive. Brand Studio solves this by:
- Reducing Costs: Create high-quality lifestyle scenes without the need for physical location shoots.
- Ensuring Localization: Quickly adapt a single image for different regions or seasons.
- Maintaining Consistency: Use your own brand assets to ensure every image looks exactly how it should.
How to use it
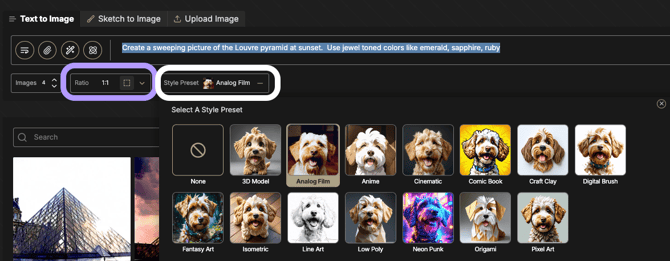
1. Define Your Aesthetic
Set your project's foundation in the sidebar before you start.
- Select a Style Preset, such as Cinematic or Line Art, to give your images a consistent look.
- Choose an Aspect Ratio that matches where your image will be used, like 9:16 for mobile or 16:9 for web.

2. Execute Your Process
Enter a description of your subject to begin the process. To include specific product SKUs or mascots, select your custom tools from the Personalization menu (Atom icon) to ensure your unique visual DNA appears in the final result.

3. Refine and Iterate
Us
e the tools on each image to improve your results:
- Re-Roll: Try a different version of the same idea.
- Edit: Adjust your settings to make specific changes.
- Variation: Create similar versions of an image you already like.
4. Finalize for Production
Prepare your final image for use:
- Fix Small Details: Use Inpainting to fix any small issues at a standard size first.
- Upscale: Once the image is perfect, use the Upscale tool to create a high-quality version for print or high-resolution screens.
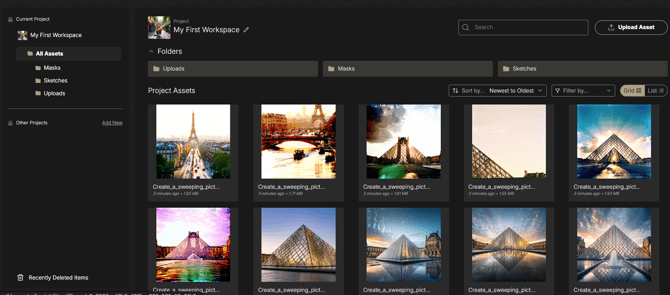
- Export: Download your work from the Library, which keeps a record of all your settings so you can use them again later.
Precision Recommendations
- Follow the Fix-Then-Upscale Workflow: Always correct small distortions in features, hands, or props using local editing tools at standard resolution before committing to a final upscale.
- Expand in Increments: When reframing an asset, increase the canvas size in small steps, (roughly 25-50% at a time) to help the system maintain consistent textures and perspective.
- Apply the Rule of Three: Execute a re-roll at least three times before adjusting your subject description; this helps determine if a result was a random glitch or a systematic issue with your process.
- Use Seamless Masking: Draw your editing masks slightly beyond the edges of the object you want to change and increase the feathering radius to ensure new content blends naturally with the original scene.